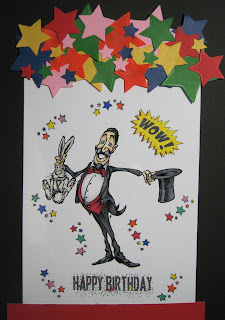
A few weeks ago, over at Make it Crafty, Zoe released these fabulous
Entertainers stamps (available in digi and rubber!)
This Magician reminded me of a trick I saw when I was a child that always impressed me.... of course now I know how its done and it is really easy but in the mind of a child it really is pure magic!
I knew I wanted to make something like this to impress my niece and nephew!
Here is how it is done!
You will need.
2 sheets of coloured card (I have used red)
2 sheets of white card
1 sheet of Printable Acetate
Embellishments (I used a die cut stars in different colours)
Card off cut
Colouring medium (I used copics)
Double sided tape
Pinflair glue (of similar)
Paper trimmer
Metal ruler and craft knife
Step 1
Decide on the size you want you image , centre on page and print on one sheet of white card and on the printable acetate. It is vital these images are printed in the same position on both sheets so that they line up perfectly. Colour the image add extra images/words if desired to the CARD ONLY!
Step 2
Line the acetate print up perfectly with the coloured image and glue along the top edge ONLY!
I used pinflair glue for this as it gives you a chance to wiggle the images around so you can get them so it looks like there is just one sheet rather than two. It makes mistakes less likely!
Put to one side to dry.
Step 3
Take your remaining white and both coloured sheets and make a sandwich. Cut a 'window' in the front sheet. Use the double sided tape to stick both sides and the bottom of all three sheets together. Using tape for this helps give a clean line to make the 'sliding' easier and smoother. Set to one side.
Step 4
Once the glue has dried on the image, trim 1.5 cm off of both sides and the bottom. This may need to be altered depending on how wide your double sided tape is.
Step 5
Now to create the 'handle'.
Using your off cut of card, stick it to the acetate just enough to cover the original glue line, and decorate.
I used the stars because it fitted the theme and the uneven edge helps to break up the harsh lines.
See how this just looks like one image layer when it is infact two, card covered with acetate!
Step 6
Now its time to make the magic happen!!
Slide in your pictures! The coloured image goes inbetween the back of the folder and the plain white card. The acetate goes between the middle and the front with the window....... the plain white card creates a divider! You should now only see the black and white version. Decorate the front!
As you pull the 'handle' the two images will meet and it will appear that the colour has been magically coloured!
TADA!!!!!
I hope this is easy to follow and any questions or comments please feel free to say!
Have fun and I hope the children love it
xx


WOW! Love this!! :D
ReplyDeleteGreat tutorial Trudie, Love this card!
ReplyDeleteCheers,
Kasey
Trudie this is an amazing project - you are so clever - this is something I will try in the future xx
ReplyDelete